


An exceptional knife is nothing without a flawless edge. More than just maintenance, sharpening is an art, a dialogue between steel and the hand that prolongs the life of your blades and enhances the pleasure of cooking. A sharp knife is not only more efficient, it is also safer.
However, many dread this step, imagining it to be complex and reserved for professionals. Think again! With the right techniques and a little practice, restoring your knives to their original edge is within everyone's reach. Follow our guide to master the secrets of a perfect edge.
Sharpening or Honing? Understanding the Difference
Before we begin, it is essential to distinguish between two terms that are often confused:
-
Sharpening: This is the action of removing a tiny amount of metal from the blade to recreate a worn or dull edge. It is an operation that is carried out periodically.
-
Sharpening: This is the daily maintenance of the cutting edge. Using a honing steel, the edge of the blade is straightened, as it can become bent with use, even microscopically. No material is removed; the existing edge is realigned.
A knife that is sharpened before each use will need to be sharpened less often.
Sharpening Tools: Which method is right for you?
There are several ways to achieve a razor-sharp edge. The choice depends on your skill level and your knives.
-
The Sharpening Stone (or water stone): This is the gold standard, the most traditional and the gentlest method for sharpening a blade. It offers total control and unparalleled results. Sharpening stones come in different grits: a coarse grit (below 1000) for repairing a damaged blade, a medium grit (1000 to 3000) for general sharpening, and a fine grit (above 3000) for a mirror finish.
-
The Manual Sharpener: Practical and quick, it's ideal for beginners. It consists of small V-shaped grinding wheels through which the blade is passed. It's a simple solution for regular maintenance, although less precise than a whetstone.
-
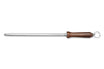
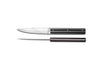
The Honing Steel: Essential for daily maintenance. As explained above, it's not used for sharpening, but for straightening the edge. One pass over each side before each use is enough to maintain the sharpness for longer.
The Step-by-Step Guide: Sharpening Your Knife with a Stone
This is the method that requires the most expertise, but provides the most satisfaction.
-
Preparing the stone: Immerse your stone in water for 10 to 15 minutes, until no more air bubbles appear. Place it on a stable, damp surface to prevent it from slipping.
-
Finding the right angle: This is the crucial step. The ideal sharpening angle for most European kitchen knives is between 15° and 20°.
-
Our pro tip: To visualize this angle, place your blade perpendicular to the stone (90°). Divide this angle in half (45°), then in half again (22.5°). You're almost there! This slight angle is what you'll need to maintain throughout the process.
-
-
The movement: Place the beginning of the blade on the stone at the correct angle. With one hand on the handle and the other placing two or three fingers flat on the blade for even pressure, slide the knife along the entire length of the stone, as if you were going to cut a thin slice. The movement should cover the entire length of the edge, from the guard to the tip.
-
The burr, your guide: After about ten passes, gently run your finger along the opposite side of the cutting edge. You should feel a very thin burr of metal, a small lip: this is the "burr". Its presence indicates that you have worked this side sufficiently.
-
Changing sides: Turn the knife over and repeat exactly the same process on the other side, with the same number of passes, until the burr flips to this new side.
-
Finishing: If you have a finer-grit stone, now's the time to use it. Make a few alternating strokes on each side to polish the edge and achieve an exceptional cutting point. To remove the final burr, make a few very light strokes on the sharpening steel or a piece of cork.
-
Cleaning: Carefully wipe your blade with a soft cloth to remove any metal and stone residue. Your knife is ready!
The Right Technique with the Sharpening Steel
Far from being a mere kitchen gadget, the honing steel is your knife's number one ally for maintaining a sharp edge every day. Its purpose isn't to remove metal, but to "comb" and straighten the blade's edge, which deforms microscopically with each cut. Proper honing takes only a few seconds and should become second nature before every use.
-
Handling: Hold the rifle firmly by the handle, with the tip pointing downwards, resting it on a stable work surface (on a cloth to prevent slipping). Your hand is thus protected by the guard.
-
The angle, always the angle: As with the whetstone, the angle is key. Present the base of the blade (near the handle) to the top of the sharpening steel at an angle of approximately 20°. This is the same angle as for sharpening.
-
The movement: Slide the blade downwards and towards you in a smooth, even motion, as if you were trying to slice a thin piece off the rifle. The movement should cover the entire length of the edge, from the base to the tip of the knife. The pressure should be very light; the weight of the knife is almost sufficient.
-
Alternating strokes: Repeat this same motion on the other side of the snifter to sharpen the other side of the blade. Alternate between each side. Five to six strokes on each side are more than enough.
Sharpening your knives is more than just a chore: it's a ritual that demonstrates the respect you have for your tools and the food you prepare. It's the promise of a clean, precise, and effortless cut. So, don't be afraid: give it a try, practice, and rediscover the pleasure of a perfect edge. Your knives and your taste buds will thank you.
